 While spending time with my family in the wild and wonderful West Virginia I tackled a couple of projects I have been putting off for a while now. The first was much needed upgrade to my “sawbench”. The original sawbench that I created was made from plywood and 2x4’s butt jointed and crudely screwed together. This original sawbench was created to be tossed at the end of a season before we had to move. Needless to say the creaking and wobbling bench was in need of a replacement.
This project was a reunion with a Delta Contractors Table Saw I bought 6 years ago and has sat in WV. The new sawbench was created out of scrap white oak and cherry that was also being stored with the table saw. I would not choose to make a sawbench out of such nice timber but it was at hand and free. Seeing as this sawbench will spend most of its life in the living areas of my house, good looks are not all that bad. Because of the endless moving in my future I made this bench small. Only 18” long! I also work on very small components because of the size of my portable workbench. (Are you starting to see pattern?) Due to the size of components I work with I decided to create one side of this bench with vertical legs so that I could rip without hitting the legs. The legs are much too close to rip in between. This design does make the bench tippy if you are right on the edge of the vertical legs side. By changing the way I “hold” the timber seems to cancel out any tipping and creates a solid support. As I use the bench more I will let you know what I think of the design. I created some holes in the stretcher to house carpenters pencils, a striking knife, and my holdfast.
The second addition to the lineup is a new striking knife. The faithful followers will note that my younger brother Nick “The Blacksmith” created a striking knife at my request about a year ago, but the knife’s metal was funky and would not hold an edge. This time around we started with a nice piece of O-1 tool steal. The result was perfect; a knife that holds an edge to all kinds of abuse and is easy to sharpen. I will update on the striking knife as it gets used on upcoming work. I also took the chance to set up and use my red oak workbench that is about mid way through completion. I screwed on a cleat and used the slab to work on. No dogs or vices just gravity.
Now it is time to get to Grand Teton, hangout with my wife, wax some skis, and set up the shop for another awesome winter season.


.JPG)
.JPG)
.JPG)
.JPG)
.JPG)
.JPG)
.JPG) Well I am a week away from finishing a season up at North Cascades National Park. If you know anything about North Cascades you might know it is a Wilderness Park. Set aside to protect what was not there, a lot of us! Being a Wilderness Park internet access is slim. None the less I don't need internet to woodwork and the shavings have been flying all summer. What else can I do on a rainy weekend day? (Trust me there were plenty!) I just completed a jewelry box for commission and it will be mailed to a friend in my winter migration spot in Moose, WY. Take a look. -Clay
Well I am a week away from finishing a season up at North Cascades National Park. If you know anything about North Cascades you might know it is a Wilderness Park. Set aside to protect what was not there, a lot of us! Being a Wilderness Park internet access is slim. None the less I don't need internet to woodwork and the shavings have been flying all summer. What else can I do on a rainy weekend day? (Trust me there were plenty!) I just completed a jewelry box for commission and it will be mailed to a friend in my winter migration spot in Moose, WY. Take a look. -Clay
.JPG)
.JPG)
.JPG)
.JPG)
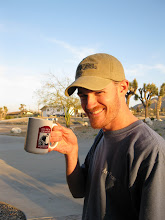
 Dad, Me, and Nick
 My first "workbench"